Testing - ViewJ8 Home « Testing - View
In this lesson of the Case Study we do some testing of our View code. For the view code we do some visual checks to ensure the GUI is working correctly. This will include starting up the Manufacturer application in non-networked client, server and networked client modes as well as checking that the visual presentation of the manufacturer data file is displayed correctly using our custom table model.
In this part of the testing we do some visual checks to ensure the GUI is working correctly. This will include starting up the Manufacturer application in non-networked client, server and networked client modes. We will also check that the visual presentation of the manufacturer data file is displayed correctly using our custom table model.
Non-Networked Client Mode Top
We will run in "Non-Networked" client mode first as this is the simplest run mode. This mode involves running the client on the same machine as the Manufacturer file location and so doesn't require a server be started for a network connection to a remote Manufacturer file location.
As this is our first use of the GUI there won't be any saved run mode options and so we will have to navigate to a Manufacturer file location.
To start in this mode we need to run the ManufacturerApplicationStartup class with an argument of client.
The following screenshot shows setting the Program arguments in IntelliJ via the run/debug configurations dialog.
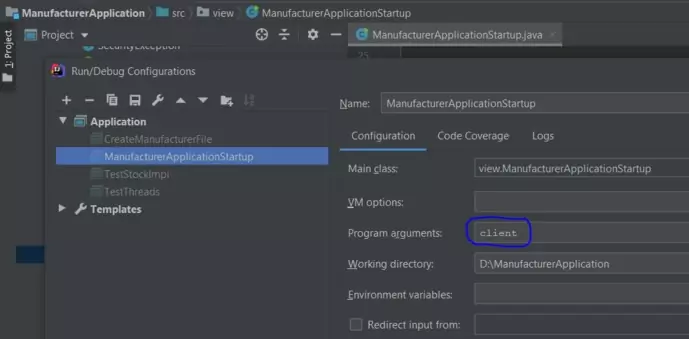
client program argument in IntelliJ.Run the ManufacturerApplicationStartup class from your IDE.
The screenshot below shows the common panel used for all run mode entries. As this is first usage there are no saved run mode properties for the Manufacturer file location and so we get a warning message telling us this is an invalid file.
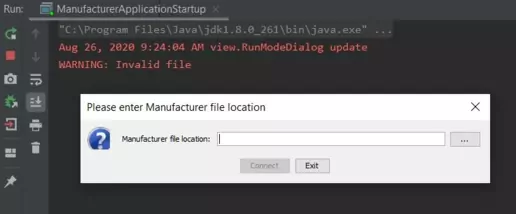
ManufacturerApplicationStartup common panel first usage.After we select a file path we get an information message showing the pathname to the Manufacturer file location. Press the 'Connect' button and the manufacturer window is displayed and should look like the following screenshot.
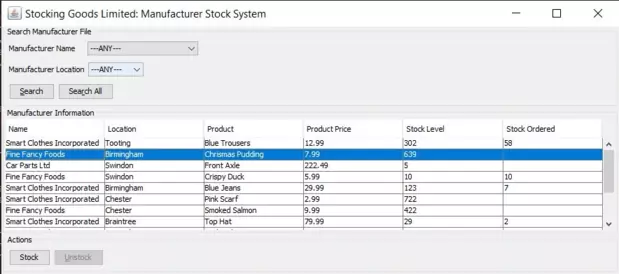
The data from the Manufacturer file should be displayed for all manufacturer data records that don't have the deletion flag field set to '1'. We can see from the visual evidence and by checking the Manufacturer file that the correct records are displayed and the format of our custom table model is working as intended.
Server Mode Top
We run "Server" mode when the Manufacturer file location is on a different machine to the client. This requires a server be started for a network connection to the remote Manufacturer file location.
To start in this mode we need to run the ManufacturerApplicationStartup class with an argument of server.
The following screenshot shows setting the Program arguments in IntelliJ via the run/debug configurations dialog.
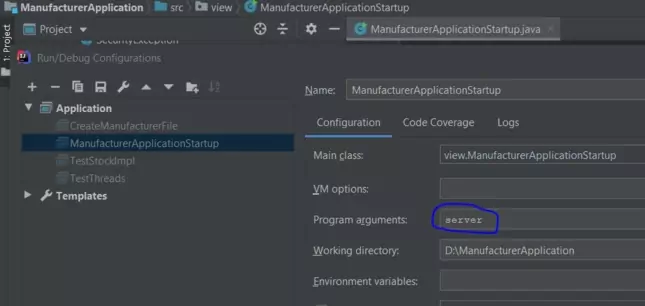
server program argument in IntelliJ.Run the ManufacturerApplicationStartup class from your IDE.
The screenshot below shows the common panel used for all run mode entries. As we have already used the application there are now saved run mode properties for the Manufacturer file location which we
will use. For "Server" mode a default port number 1099 is added which is also fine as we are just going to use the localhost for this. We can of course change the port number to
whatever is required, within a set of valid ranges, if we so wish.

ManufacturerApplicationStartup Common panel (server).Press the 'Start Server' button and the RMI registry should start on port number 1099 as shown in the following screenshot.

Make sure you keep the server running in its own JVM, as we need the server connection up and running for networked client mode, which we will run in a new JVM in the next part of the lesson.
Networked Client Mode Top
To run in "Networked" client mode make sure we already have Server" mode started so we have a network connection to the remote Manufacturer file location.
To run another ManufacturerApplicationStartup application we will have to run it from the command line, so open a command line window.
Change to directory cd D:\ManufacturerApplication\out\production\ManufacturerApplication or wherever your bytecode for the ManufacturerApplication project is.
Run the ManufacturerApplicationStartup class from the ManufacturerApplication directory using our client package as well:
java client.ManufacturerApplicationStartup
The screenshot below shows the common panel used for all run mode entries. The Manufacturer file points to a Manufacturer file location of localhost with a port number 1099 which is
exactly want we want to test "Networked" client mode from the same computer.

ManufacturerApplicationStartup Common panel (network).Press the 'Connect' button and the manufacturer window is displayed and should like the following screenshot. We have also included the command prompt screen so you can see the connection to the remote proxy.
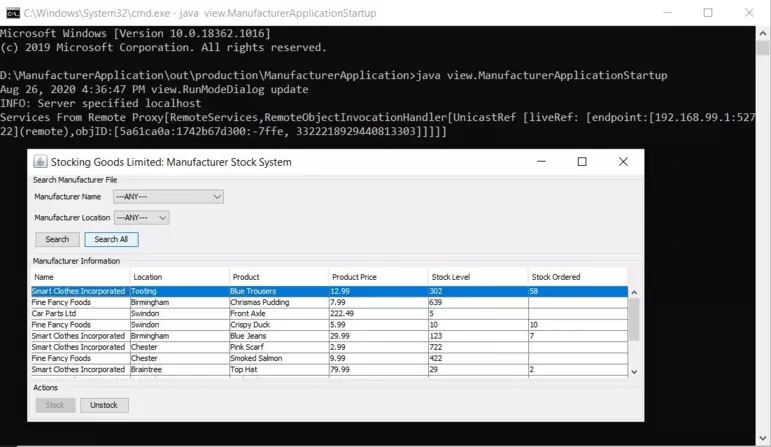
The data from the Manufacturer file should be displayed for all manufacturer data records that don't have the deletion flag field set to '1'. We can see from the visual evidence and by checking the Manufacturer file that the correct records are displayed and the format of our custom table model is working as intended.
That concludes our testing for the view side of the case study and of course in the real world you would be a lot more thorough and do a lot of tests that we have not shown here.
Lesson 19 Complete
In this lesson we tested the View elements of the MVC pattern.
What's Next?
In the next lesson we test the Controller elements of the MVC pattern.