Testing - ControllerJ8 Home « Testing - Controller
In this last part of testing we do some visual checks to ensure the controller code is working and end-to-end testing to show that the disparate parts of our system function together correctly.
We have already used controller code for some end-to-end testing without maybe being aware of it by getting a local/remote connection to the StockImpl singleton, for registering our services with the ServicesImpl singleton locally and via a RemoteServicesImpl instance remotely, or by populating our custom ManufacturerTableModel table model on initial entry.
In this part of the lesson we test the stocking and unstocking functionality both locally and remotely. We can only order stock once, so if the amount entered is wrong the goods will have to be unstocked and the correct stock order reentered. What this means for us as programmers and the way we have coded these buttons in the GUI is that when stock is ordered, the Unstock button is activated and the Stock button is deactivated. When no stock has been ordered, the Stock button is activated and the Unstock button is deactivated.
Localized Stocking/Unstocking Top
To test localized stocking and unstocking we will have to run in "Non-Networked" client mode. This mode involves running the client on the same machine as the Manufacturer file location and so doesn't require a network connection to a remote Manufacturer file location to be started. In "Non-Networked" client mode a user is only ever able to stock or unstock a product, as the Stock and Unstock buttons will never be active at the same time. Click on rows in the manufacturer information panel and you can see how the Stock and Unstock buttons are activated/deactivated dependant upon the Stock Ordered field being populated or not.
To start in this mode we need to run the ManufacturerApplicationStartup class with an argument of client.
The following screenshot shows setting the Program arguments in IntelliJ via the run/debug configurations dialog.
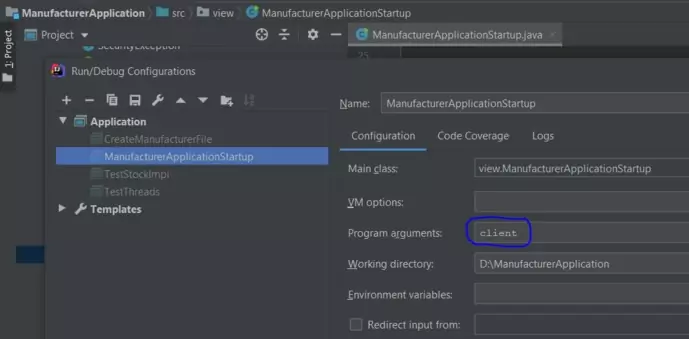
client program argument in IntelliJ.Press the 'Connect' button and the manufacturer window is displayed as shown below.
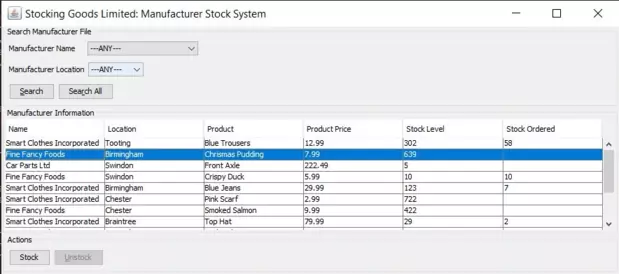
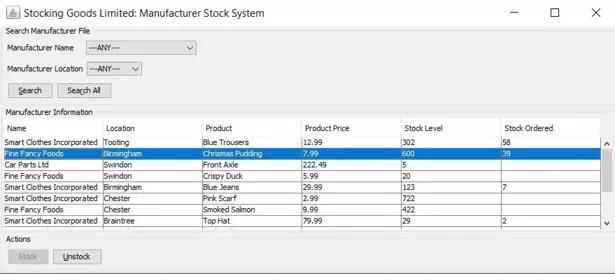
Click on the second row of Manufacturer Information - Fine Fancy Foods, Birmingham and then click the Stock button. Order an amount of 39.
Click on the fourth row of Manufacturer Information - Fine Fancy Foods, Swindon and then click the Unstock button.
The Stock Level and Stock Ordered fields of these rows should have been updated as shown below:
Remote Stocking/Unstocking Top
To test remote stocking and unstocking we will first have to start a server for a network connection to the remote Manufacturer file location.
To start in this mode we need to run the ManufacturerApplicationStartup class with an argument of server.
The following screenshot shows setting the Program arguments in IntelliJ via the run/debug configurations dialog.
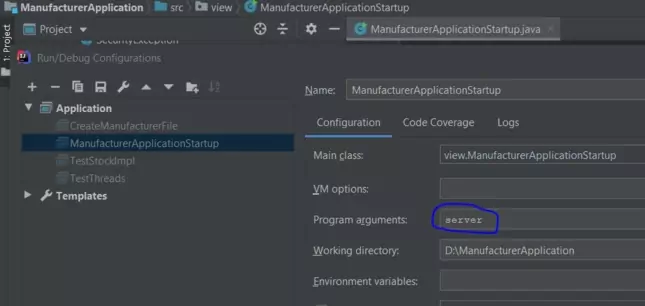
server program argument in IntelliJ.Run the ManufacturerApplicationStartup class from your IDE.
The screenshot below shows the common panel used for all run mode entries. As we have already used the application there are now saved run mode properties for the Manufacturer file location which we
will use. For "Server" mode a default port number 1099 is added which is also fine as we are just going to use the localhost for this. We can of course change the port number to
whatever is required, within a set of valid ranges, if we so wish.

ManufacturerApplicationStartup Common panel (server).Press the 'Start Server' button and the RMI registry should start on port number 1099 as shown in the following screenshot.

Make sure you keep the server running in its own JVM, as we need the server connection up and running for networked client mode, which we will run in a new JVM in the next part of the lesson.
To run in "Networked" client mode we need to run the ManufacturerApplicationStartup class with no arguments in a new command prompt window.
Change to directory cd D:\ManufacturerApplication\out\production\ManufacturerApplication or wherever your bytecode for the ManufacturerApplication project is.
Run the ManufacturerApplicationStartup class from the ManufacturerApplication directory using our client package as well:
java client.ManufacturerApplicationStartup
Press the 'Connect' button and the manufacturer window is displayed.
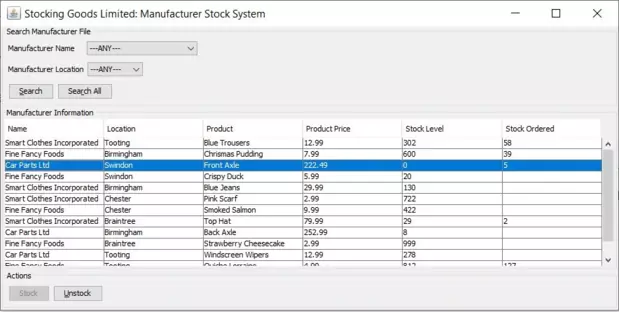
Click on the third row of Manufacturer Information - Car Parts Ltd, Swindon and then click the Stock button. Order an amount of 5.
Click on the fifth row of Manufacturer Information - Smart Clothes Incorporated, Birmingham and then click the Unstock button.
The Stock Level and Stock Ordered fields of these rows should have been updated as shown below:
There are lots of other tests that we can do such as opening two remote clients to create a StockingException exception where multiple users are trying to order stock concurrently. This can be simulated by pressing the Stock button on both remote clients and then entering an amount of stock to order on one client and then the other.
Feel free to test this and other parts of the application as you wish :)
This completes the testing for the Manufacturer application.
Lesson 20 Complete
In this lesson we tested the Controller elements of the MVC pattern.
Related Java Tutorials
What's Next?
In the next lesson we create documentation by using the javadoc tool on the packages we have coded.